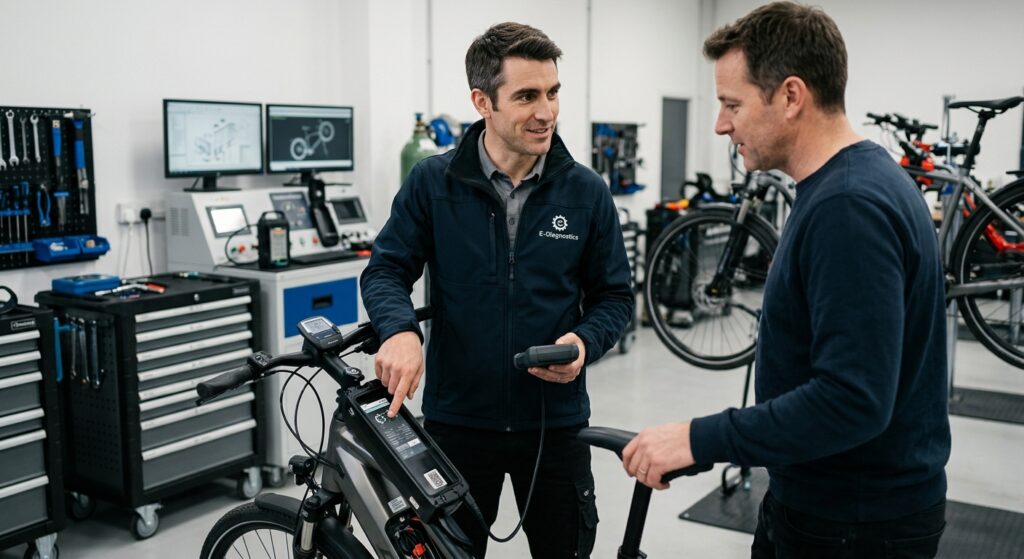
If your electric bike has no display, no lights, and no response from the power button, start with three things: make sure the battery is safe to handle, confirm the exact startup procedure for your model, and reseat the battery if the manufacturer allows removal.
Do not assume the battery, controller, or display has failed just because the bike looks dead. A battery can show charge while usable power still fails to reach the bike.
And if the battery is swollen, unusually hot, leaking, cracked, smoking, sparking, or visibly heat-damaged, stop using and charging the bike. Skip troubleshooting and move to manufacturer or qualified-service support.
For the first round of checks, you usually don’t need a multimeter. Your bike’s manual, the correct key if it uses one, and a good visual inspection are more useful starting points.
First, Make Sure You Have the Right “Won’t Turn On” Problem

“Won’t start” can describe several different failures. Identify yours before troubleshooting.
Nothing responds.<br>No display, lights, beep, or other sign of system power. This is the main no-power problem covered in this guide.
The battery responds, but the display stays black.<br>Battery LEDs or another battery indicator works, but the handlebar electronics do not. Go to the display-power section after completing the basic checks.
The bike starts, then immediately shuts down.<br>The system begins booting but cannot remain on. Battery seating, an unstable connection, battery protection, or another electrical fault may be involved.
The display works normally, but the motor will not assist.<br>That is probably not a total no-power problem. Motor, throttle, pedal-assist, brake-cutoff, or related troubleshooting is the better path.
That distinction matters because replacing or testing battery parts won’t help much if the electrical system is already powering the display normally.
Stop if the Battery or Electrical System Shows These Warning Signs

Before removing a battery or touching a connector, look for signs that this is no longer a normal troubleshooting job.
Stop using and charging the bike if you notice:
- Battery swelling or deformation
- Smoke
- A burning or unusual chemical smell
- Unexplained or excessive heat
- A cracked or leaking battery enclosure
- Sparking
- Melted plastic
- Burnt or badly scorched battery contacts
- Severe battery impact or crushing
- Obvious serious wiring damage
- Suspected water inside the battery or another electrical enclosure
If a battery is smoking or involved in a fire, move away rather than handling it and contact local emergency services.
For U.S. riders, the Consumer Product Safety Commission recommends following the manufacturer’s charging instructions, using the supplied or manufacturer-recommended charger, and using only replacement battery packs confirmed suitable for the device.
Don’t Use Risky “Shortcuts” to Wake a Dead E-Bike
Avoid procedures that involve:
- Opening a sealed lithium-ion battery
- Shorting charge or battery terminals
- Bypassing the BMS or another protection device
- Feeding external voltage into a battery to “wake” it
- Guessing connector polarity
- Rewiring a supposedly compatible battery
- Replacing a fuse with a higher-rated one
- Using another e-bike’s charger simply because the plug fits
CPSC specifically warns that chargers marketed as “universal” can physically fit a micromobility device and still be electrically incompatible, creating a fire risk.
Run These Five Quick Checks Before Looking for a Failed Part

These checks eliminate ordinary setup and connection problems before you move deeper into diagnosis.
1. Confirm the Correct Startup Procedure
Check the manual for your exact bike or electrical system.
Some bikes start from the handlebar display or controller. Others can also be powered from the battery. Button location and press duration vary, so don’t rely on a generic internet instruction such as “hold the power button for five seconds.”
Bosch, for example, documents different ways to switch on particular Bosch systems, including controls on the bike and, on supported configurations, the battery itself. That is a good example of why the correct procedure should come from the actual system manufacturer.
What this tells you: If the bike starts normally, you had a startup or activation issue rather than a confirmed electrical failure.
2. Check the Battery’s Normal Indication
Press the battery’s charge indicator if it has one.
No response at all can justify checking the correct charger and manufacturer instructions. If the battery itself will not charge or respond, move to battery-specific troubleshooting instead of dismantling the pack.
What this tells you: Battery LEDs provide useful evidence, but they do not prove the entire battery and bike power path are healthy.
3. Check Any Battery Switch, Key, or Ignition Position
If your model uses a battery switch, key, ignition, or separate enable control, make sure it is in the required position.
Don’t force a key or switch that feels damaged.
What this tells you: A working bike may appear completely dead if one of its required enable controls is off.
4. Make Sure the Battery Is Fully Seated and Locked
If the battery is removable, follow the manufacturer’s removal and installation procedure.
A battery can appear to be installed while sitting slightly short of full engagement with its discharge contacts.
Check that it sits in its normal position and that its latch or lock engages as designed.
What this tells you: If reseating restores power, the problem was likely somewhere around installation or contact rather than proof of a failed controller or display.
5. Inspect Only the Connections the Manufacturer Expects You to Access
With the system off, inspect visible, user-accessible connections for:
- Incomplete seating
- Pulled or pinched cables
- Moisture
- Dirt or corrosion
- Bent or recessed contacts
- Broken connector locks
- Heat discoloration
Do not start dismantling a controller enclosure or sealed battery because a similar-looking bike online has a connector inside.
What this tells you: Visible damage or a loose accessible connector can narrow the fault. A normal-looking connector does not prove the internal electrical system is healthy.
Match Your Symptom to the Next Check
| What the bike does | Go here next |
|---|---|
| Completely dead | Battery seating, contacts, and main accessible power connection |
| Battery LEDs work but display is black | Display/control-unit power path |
| Battery looks charged but bike is dead | Charge indication vs. usable battery output |
| Starts, then immediately dies | Battery/contact stability and shutdown section |
| Only powers up with charger connected | Battery discharge/output path |
| Failed after storage | Storage branch |
| Failed after transport or assembly | Transport/delivery branch |
| Failed after a battery replacement | Replacement-battery branch |
| Failed after rain or washing | Water-exposure branch |
| Failed after a crash or battery drop | Impact branch |
| Display works but motor does not | Motor/assist troubleshooting |
| Cuts out only while riding | Riding power-loss troubleshooting |
The important point is that a symptom narrows the investigation; it rarely proves which component has failed.
Check the Battery Seating, Contacts, and Main Power Connection

Once normal startup is ruled out, the most useful owner-level question is simple:
Can power reliably pass from the battery into the bike?
Remove and Reseat the Battery Correctly
If your battery is designed for owner removal:
- Switch the bike off.
- Remove the battery using the documented procedure.
- Check the mount for obvious obstruction or damage.
- Reinstall the battery completely.
- Confirm that the lock or retention mechanism engages normally.
Don’t push, strike, or force a battery that no longer fits the way it used to.
Inspect the Battery Contacts and Cradle
Look only at contacts that are normally exposed when the battery is removed.
Check for:
- Dirt or foreign material
- Corrosion
- Moisture
- Recessed or visibly bent contacts
- Loose components
- Dark discoloration
- Melting or scorching
Follow the manufacturer’s cleaning instructions. Avoid scraping plated contacts or spraying an unidentified cleaner into electrical connectors.
Burning, melting, or significant heat damage is a stop condition—not a cleaning job.
Check a Fuse Only if Your Manual Says You Can
Not every e-bike has the same fuse arrangement, and some fuses are inside equipment that owners should not open.
Only inspect or replace a fuse when the documentation for the exact bike or battery identifies:
- A user-serviceable fuse
- Its location
- Its required type
- Its correct rating
- The approved replacement procedure
Never fit a higher-rated fuse to stop a replacement from blowing.
If the correct replacement fuse fails again, stop. Something is causing the overcurrent or fault, and repeated fuse replacement does not solve it.
The Battery Looks Charged, but the Bike Is Still Dead

This is one of the most useful distinctions in e-bike troubleshooting:
A charge indication is not the same thing as usable power reaching the bike.
Battery LEDs Are Evidence, Not a Complete Diagnosis
If the battery gauge lights up, you know at least part of the battery’s indicator electronics is responding.
You do not yet know that the pack can supply the bike correctly under normal operating conditions.
That means “all battery lights are on” should not immediately become “the controller is bad.”
A Green Charger Light Can Mean Different Things
Charger indicators are system-specific.
Depending on the charger and battery, a particular light can represent completed charging, standby behavior, no active charging, or another defined state. Check the charger’s actual manual.
A green indicator by itself does not prove that power is successfully leaving the battery and reaching the display.
One Voltage Reading Doesn’t Prove Full Battery Health Either
If you already have a legitimate manufacturer-approved diagnostic procedure that includes voltage measurement, the result can provide useful information.
But a plausible open-circuit reading does not by itself establish that the battery can deliver usable power under load, that its protection system will permit discharge, or that the bike-side connection is intact.
For a beginner-facing troubleshooting path, you should not need a multimeter before completing the external checks above.
If the Bike Only Powers Up With the Charger Connected
Treat that behavior as a clue, not a workaround.
It shifts attention toward the battery’s normal discharge/output path or another system condition, but it does not prove one particular component has failed.
Do not ride the bike or use the charger as a substitute power supply.
At this stage, if seating and accessible connections are correct, separate battery testing or manufacturer diagnosis becomes more useful than random part replacement.
The Battery Responds, but the Display Stays Blank

A working battery indicator plus a dead display narrows the problem, but it still doesn’t tell you to buy a display.
Think of the basic power path like this:
Battery → battery contacts/mount → main wiring → system/controller interface → display or control unit
The interruption can occur before the display itself.
Recheck the Display’s Correct Startup Procedure
Use the procedure for your exact display or control system.
Some systems have removable displays, separate remotes, internal display batteries, or different ways to initialize the bike. Bosch’s support documentation, for example, tells users on certain systems to verify that removable components such as the battery or display are correctly engaged when an e-bike will not switch on.
That is model-specific guidance, not a universal instruction for every e-bike.
Inspect User-Accessible Display Connections
If the manufacturer identifies a display connector as owner-accessible, switch the bike off and inspect it.
Look for obvious incomplete engagement, bent pins, moisture, cable damage, or a connector disturbed during transport or assembly.
Don’t force keyed or waterproof connectors together when their alignment is unclear.
Don’t Diagnose the Display From Darkness Alone
A black display may result from:
- No power reaching the display
- An upstream connection problem
- Damaged wiring
- A controller or system-interface issue
- A communication fault
- A display/control-unit fault
You need system-specific testing to distinguish those once external checks are exhausted.
The E-Bike Turns On, Then Immediately Shuts Off

A bike that boots briefly is giving you a different clue from one that never responds at all.
First, pay attention to when it shuts down.
If it dies almost immediately during startup, stay in this section.
If it runs normally and loses power later while accelerating, climbing, riding over bumps, or after several minutes, use a riding-power-loss troubleshooting guide instead.
Recheck Battery Stability
A battery can make momentary contact without maintaining a reliable connection.
Check its seating, retention mechanism, accessible contacts, and any manufacturer-accessible main connector again.
If the battery visibly moves in its mount when it should be secure, stop and address the mounting problem rather than repeatedly trying to boot the bike.
Battery Protection or a System Fault May Be Involved
Modern e-bike batteries and electrical systems can shut down when they detect certain faults.
However, “the BMS is shutting it down” should not become a diagnosis from symptoms alone.
Manufacturer error information illustrates this model-specific reality: Bosch documents battery-related errors that may cause shutdown and directs users to restart the bike, then contact a specialist dealer if the error persists.
Do not bypass battery protection circuitry to test whether the bike stays on.
What Happened Just Before the Bike Stopped Working?

When a bike worked normally and then became dead after a specific event, that event is one of your best diagnostic clues.
After Storage or Winter
Check the manufacturer’s storage and charging instructions first.
Confirm whether the battery responds, whether it can be charged using the approved charger, and whether the manufacturer documents any sleep, storage, or wake procedure.
Do not apply a universal “BMS wake-up” method from an unrelated battery.
If the battery remains unresponsive after the documented procedure, battery-specific service is the safer next step.
After Transport, Delivery, or Assembly
Think about what was moved or disconnected.
Check:
- Battery seating and locking
- Removable controls or display, if applicable
- Connections explicitly identified in the assembly instructions
- External cables that may have been pinched or pulled
- The normal startup procedure
If the bike is brand new, involve the seller or manufacturer before dismantling electrical components. A new e-bike should not require improvised rewiring to make it function.
After Replacing the Battery
A replacement battery needs more than the right physical shape.
Use the battery specified or approved for the exact bike and electrical system, and confirm the correct charger.
For U.S. consumers, CPSC recommends replacement or secondary battery packs that have been tested and approved to work safely with the device and confirmed suitable by the device manufacturer.
If the original battery powered the bike immediately before the swap and the replacement battery does not, tell support exactly that. The before-and-after comparison is useful evidence.
Do not alter polarity, splice connectors, or modify the bike to force an unverified battery to work.
After Rain or Washing
Avoid repeated startup attempts if you suspect water has entered an electrical component.
Inspect accessible external housings and connections for visible moisture or damage, then follow the manufacturer’s instructions.
Water resistance varies by system. Bosch, for example, explicitly advises against high-pressure or steam cleaning because water can penetrate sensitive e-bike components.
Suspected internal water entry, submersion, electrical burning, heat, or sparking is a reason to stop and obtain professional assessment.
After a Crash or Battery Drop
A crash changes both the electrical diagnosis and the safety decision.
Check the battery housing and mount for visible damage, along with accessible wiring and controls.
Also remember that an e-bike can regain electrical power and still be unsafe to ride because of mechanical crash damage. Check the frame, fork, wheels, brakes, and steering as appropriate before riding again.
A battery that has suffered serious impact or case damage deserves professional assessment rather than repeated charging and power-on attempts.
After a Firmware or App Update
Software problems are especially system-specific.
Record:
- Bike model
- Electrical system
- App name
- Current software version, if visible
- Which components were updated
- What happened immediately afterward
Then use the manufacturer’s recovery or support process.
For example, Bosch documents update-related troubleshooting for its smart system and notes that incomplete component updates can affect functionality.
Don’t use firmware from another bike model or start replacing electrical hardware solely because the failure followed an update.
Should You Reset the E-Bike?
Only if your manufacturer documents a reset, restart, or recovery procedure for your exact system.
There is no single reset sequence that safely applies to every e-bike battery, display, controller, and BMS.
A documented reset might involve an ordinary power cycle, a control-unit sequence, an app procedure, or a manufacturer-specific recovery process.
Follow that procedure exactly.
A reset will not repair:
- Burnt contacts
- Broken wiring
- A loose battery mount
- An incompatible replacement battery
- Water damage
- Crash damage
- A physically damaged battery
- Failed electrical hardware
If those conditions are present, repeating a reset only delays the repair that is actually needed.
When to Stop Troubleshooting and Get Service
If you’ve completed the safe external checks and the bike still will not power on, you have not failed at troubleshooting.
You’ve reached the point where testing—not guessing—is required.
Contact the seller or manufacturer when the bike is new, under warranty, stopped working after an official update, or failed immediately after fitting an approved replacement component.
Contact an e-bike technician or authorized dealer when power still does not reach the display after external checks, a documented fuse fails repeatedly, internal wiring is suspected, or the cause requires electrical measurements beyond the manufacturer’s owner procedure.
Contact the battery or bike manufacturer/qualified battery service when the remaining question involves internal battery health, protection-system behavior, internal faults, or battery repair.
Stop using or charging the bike rather than performing another test when you have heat, swelling, smoke, sparking, serious burn damage, significant battery impact, or suspected internal water damage.
Give Support This Information Before They Start Guessing Too
A useful fault report can reduce repeated questions and unnecessary part swapping.
Record:
- Bike brand and exact model
- Approximate model year
- Electrical or motor system, if known
- Battery model or label
- Charger model
- When the bike last worked normally
- Exactly what happened before it failed
- What happens when you press the power button
- Battery LED behavior
- Charger indicator behavior
- Display behavior
- Any visible error code
- Recent storage, transport, rain, washing, crash, update, or battery replacement
- Which checks you’ve already completed
- Photos of visible external damage or suspect connectors
The aim is not to guess whether the battery, display, controller, or BMS is bad.
It’s to establish what you can safely verify, avoid replacing parts without evidence, and give the right technician or manufacturer enough information to finish the diagnosis.
If your display works but the motor does not assist, continue with motor, throttle, or pedal-assist troubleshooting. If the battery itself won’t charge, switch to a battery-not-charging guide instead.