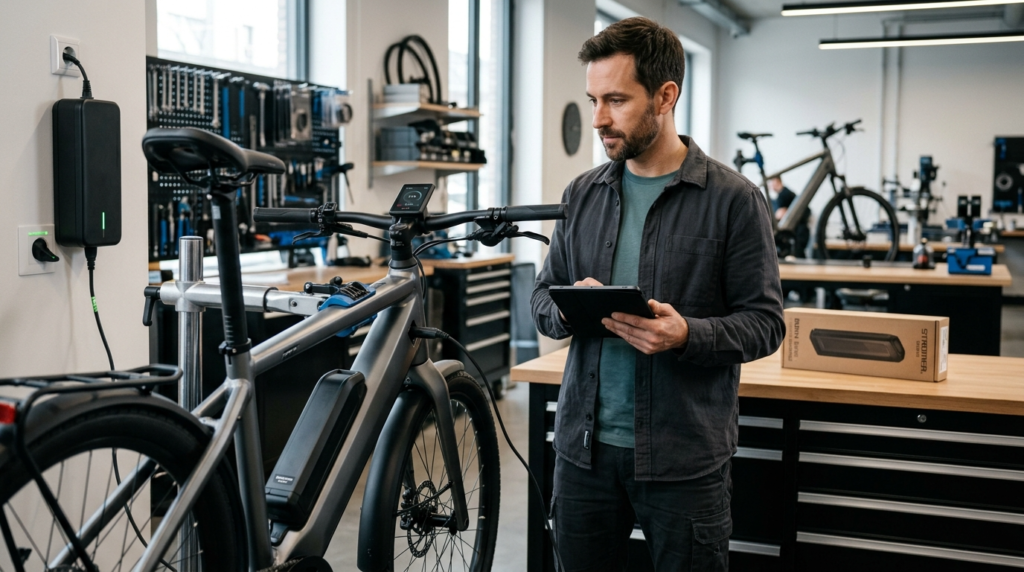
If your e-bike battery won’t charge, don’t buy a new battery yet. First rule out the parts of the charging path you can check safely: the wall outlet, the exact approved charger, the charge port and plug, and the battery’s seating or external contacts.
Stop troubleshooting if the battery becomes unusually hot, swells or bulges, develops an unusual smell, smokes, shows serious physical damage, or may have suffered significant water ingress. Those are no longer ordinary “why won’t it charge?” symptoms. Supplementary fire-service guidance also treats unusual heat, swelling, smells, and submersion as reasons for caution.
For normal charging attempts, the U.S. Consumer Product Safety Commission advises using the charger supplied with or recommended by the manufacturer, following the manufacturer’s charging instructions, and staying present while the device charges.
The fastest way to diagnose the problem is to identify what the battery and charger actually do, rather than work through a long list of possible failures.
Stop Here If the Battery or Charger Looks Unsafe

Do not continue ordinary troubleshooting if you see:
- swelling or a distorted battery case;
- unusual or rapidly increasing heat;
- smoke or an unusual burning-type smell;
- obvious impact damage;
- melted, burnt, badly damaged, or exposed connectors;
- significant flooding or submersion;
- a visibly damaged charger or cable.
If any of these apply, disconnect or stop using the equipment only if you can do so safely and follow the manufacturer’s safety guidance or seek qualified service.
Do not open a lithium-ion battery pack simply because it refuses to charge.
This guide will not ask you to bypass the BMS, jump battery terminals, repair the charger internally, probe internal cells, or improvise a battery “wake-up” method.
For wider battery-safety guidance, see Electric Bike Battery Safety.
Find Your Symptom Before You Start Replacing Parts

Choose the description closest to what you’re seeing:
- The charger has no light: verify the outlet first. If the outlet works and the approved charger remains completely unresponsive, the charger or its power path deserves attention.
- The charger turns green immediately even though the battery is low: don’t assume the battery is full. Check the connection and then verify what that LED state means for your exact charger.
- The charger blinks or cycles through colors: record the exact pattern rather than guessing. Manufacturer documentation matters here.
- Charging starts but stops before 100%: note whether it stops at roughly the same percentage every time.
- It stopped charging after months in storage: storage state, temperature, or a battery protection condition may be relevant.
- A brand-new battery won’t charge: check setup first, then use only manufacturer-documented activation or shipping-mode procedures.
- The problem began after rain or washing: treat moisture as a safety issue before attempting another charge.
- The battery appears charged but the bike has no power: you may have moved beyond a charging fault and into an output, contact, or bike-side problem.
That distinction matters. “My battery won’t charge” can describe several different faults that require different next steps.
Start Outside the Battery: Check These Four Things First

The safest diagnostic order is to eliminate simple external causes before assuming an internal battery or BMS failure.
1. Confirm the outlet and the exact charger
Test the wall outlet with another device you know works.
Then check the charger label and confirm that it is the charger supplied with, or specifically recommended for, your battery and bike.
Do not choose a replacement charger simply because:
- the plug fits;
- the voltage printed in an online listing looks similar;
- the seller calls it “universal”;
- it claims to work with a broad category of e-bikes.
CPSC specifically warns that a so-called universal micromobility charger may physically fit a device while still being electrically incompatible with its battery system.
Before you replace the battery: establish that the correct charger is actually receiving power and behaving as its manufacturer says it should.
2. Inspect the charger plug and charge port
With the system switched off and disconnected as directed by its manufacturer, look at the externally accessible charging components.
Check for:
- dirt or debris;
- moisture;
- corrosion;
- bent or recessed contacts;
- discoloration;
- melted plastic;
- a loose or damaged port;
- cuts or damage in the charger cable.
Don’t insert metal objects into the connector or try to reshape contacts while the system is energized.
A damaged charging port can mimic a bad battery because the battery may never receive the charging current in the first place.
3. Check battery seating and external contacts
If your battery is removable, make sure it is seated and locked exactly as the bike manufacturer specifies.
Inspect only the external contacts designed to be accessible to the owner.
A battery that is slightly out of position can create confusing symptoms: the charger or battery may appear alive while the bike itself cannot communicate with or draw power from it.
4. Record what the charger actually does
Instead of writing down only “charger isn’t working,” record:
- its LED state when powered;
- what changes when it is connected according to the manufacturer’s instructions;
- whether charging appears to begin;
- whether the battery percentage changes;
- whether the final charger state matches the manual.
This turns a vague complaint into diagnostic evidence.
If the outlet, approved charger, connectors, port, and battery seating all appear normal but the battery still refuses to accept charge, an internal battery/protection problem becomes more plausible.
That is usually the point to escalate diagnosis rather than open the pack.
Charger Is Green but the Battery Is Empty: Timing Matters More Than Color

A green charger light does not have one universal meaning across every e-bike.
Ask one question first:
When did it turn green?
Green before the charger reaches the battery
On some systems this can simply indicate a powered or standby state.
It tells you very little about the condition of the battery.
Green immediately after connecting a low battery
This is more useful diagnostically.
If your battery reports a low charge but the charger immediately shows the state that its manufacturer normally associates with “full” or “finished,” verify:
- the charger is the correct model;
- the connector is fully seated;
- the charge port is clean, dry, and undamaged;
- the battery’s indicated charge actually changes;
- the manufacturer’s LED documentation.
Hypothetical example: A battery display shows 10%. The charger goes immediately to its documented “charge complete” state, and the display still shows 10% an hour later. That is not enough evidence to call the battery full—or dead. The charger/connection/battery path still needs to be isolated.
Green after normal charging
If the charger changes to its documented completed-charge state after a normal charging period and the battery’s state of charge has increased appropriately, that is a very different pattern.
This is why copying LED advice between brands is risky.
For example, current VanMoof documentation for specified S6/S5/A5 chargers distinguishes steady orange, breathing green, breathing red, steady green, blinking red, and other patterns. It also notes that charger behavior changed following a charger update. Those definitions apply to the identified VanMoof systems, not e-bikes generally.
Don’t replace the battery just because the charger is green. First establish what green means for that exact charger and whether the battery actually gained charge.
Battery Charges but Stops Before 100%: Look at the Pattern

A battery that accepts some charge needs a different diagnosis from one that accepts none.
The most useful question is:
Does it stop at roughly the same level each time?
It repeatedly stops near the same percentage
A consistent ceiling is worth recording.
Before assuming cell imbalance or battery failure, check whether your model has:
- a configurable charging limit;
- battery-preservation settings;
- manufacturer-documented calibration behavior;
- a known display/state-of-charge issue.
Also compare the percentage with real behavior. Has usable range dropped significantly? Does the bike shut down earlier than expected?
Hypothetical example: Repeatedly stopping around 79–81% is a different diagnostic pattern from stopping at 58% one day and 92% another.
The stopping point moves around
Variable cutoffs can point you back toward changing conditions such as:
- temperature;
- an intermittent connection;
- charger behavior;
- battery seating;
- model-specific errors.
Don’t deliberately run many charge cycles merely to collect data. If the pattern has already occurred more than once during normal use, record it.
The display percentage looks wrong
Displayed state of charge is an estimate from the bike’s battery/electronics system. A strange percentage alone doesn’t establish an internal battery failure.
Likewise, seeing “100%” does not prove the battery can deliver normal usable power under load.
Avoid generic advice to leave every e-bike battery charging for extra hours “to balance the cells.” Use balancing or calibration procedures only when the manufacturer documents them for your system.
If repeated early cutoff comes with noticeably reduced range or other battery-health symptoms, continue with How to Check E-Bike Battery Health Safely rather than turning this charging guide into an internal battery-testing guide.
Battery Won’t Charge After Storage, Cold, or Heat

Temperature and storage history can temporarily change charging behavior. They do not automatically prove the battery needs replacing.
If the bike sat unused for months
Write down:
- roughly how long it was stored;
- its approximate charge level before storage;
- whether it was stored in extreme heat or cold;
- whether the battery has shown any response since;
- what the approved charger does when connected normally.
A battery stored for a long time at a very low state of charge may require model-specific diagnosis.
Don’t apply an external voltage or improvised “jump” procedure to a sealed battery.
For the site’s dedicated storage/deep-discharge path, see How to Wake Up a Dead E-Bike Battery Safely.
If the battery is very cold or hot
Don’t force charging while a battery is clearly outside the conditions its manufacturer permits.
If it is cold, let it warm naturally under appropriate indoor conditions. If it is hot after riding or storage, let it cool before charging. Avoid direct heaters, hair dryers, or other forced heating.
London Fire Brigade advises allowing a cold battery to warm before charging and says not to attempt charging a frozen battery.
The exact temperature limits are manufacturer-specific.
For example, current VanMoof S6 charging instructions specify a charging-temperature range of 5°C to 30°C (41°F to 86°F). That is useful evidence of manufacturer variation, not a universal temperature range for all e-bikes.
If the battery returns to its documented charging conditions and still refuses to charge, temperature alone no longer explains the failure.
Brand-New E-Bike Battery Won’t Charge: Protect the Warranty First

A new battery should not be diagnosed like an old pack that has spent years in service.
Before experimenting, confirm:
- the supplied or approved charger is being used;
- the outlet works;
- the battery is properly installed;
- required shipping or protective material has been removed;
- any switch, key, or charging prerequisite is positioned as the manufacturer specifies;
- the port and connectors show no shipping damage.
If possible, photograph the charger label, battery label, port, and displayed error before trying unusual procedures.
Don’t assume every new battery has a universal “sleep mode”
Shipping, activation, firmware, and sleep behavior vary by system.
VanMoof provides a good example. Its current S6 documentation says an unresponsive bike may have entered Deep Sleep/Shipping Mode and supplies a specific procedure for that model.
That does not mean the same procedure should be copied to another brand.
Use only the wake, reset, activation, or firmware procedure documented for your exact bike or battery.
Know when to stop troubleshooting a new product
If a brand-new battery still will not charge after the normal setup procedure, working outlet, approved charger, and manufacturer-documented first-use steps have been checked, move toward seller/manufacturer support.
Opening or modifying a new battery can add risk and may complicate a warranty claim.
Battery Won’t Charge After Rain or Washing: Don’t Test It While Wet

If the problem appeared immediately after rain, washing, flooding, or another moisture event, the normal diagnostic sequence changes.
Don’t reconnect wet charging components merely to see whether they work.
First, determine what kind of water exposure occurred
Light external moisture is not equivalent to:
- immersion;
- deep flooding;
- pressure washing;
- visible water inside a battery or connector;
- substantial impact followed by water exposure.
Dry externally accessible components according to the manufacturer’s instructions and make sure the charging port and plug are dry before considering another normal charging attempt.
London Fire Brigade states that lithium-ion e-bike batteries are not waterproof, warns that water ingress can contribute to short circuits, corrosion, and battery failure, recommends drying a wet bike/battery before charging, and advises against using a submerged battery.
Stop routine DIY if internal ingress is plausible
Escalate to the manufacturer, retailer, or qualified service provider if:
- the battery was submerged;
- water appears to have entered the casing;
- corrosion or electrical damage is visible;
- the battery develops unusual heat, swelling, or smell;
- the charge port has been damaged;
- the manufacturer’s normal drying and inspection process does not restore charging.
Don’t open the battery to dry it internally, and don’t apply high heat.
If you need broader battery/fire-safety information rather than no-charge diagnosis, use the site’s dedicated Electric Bike Battery Safety guide.
Battery Says Full but the Bike Has No Power? Stop Blaming the Charger

This is an important diagnostic boundary.
If the battery genuinely accepts a normal charge but the bike still will not power up or provide assistance, you may no longer have a charging problem.
Battery shows charge but the bike reports empty
With the system switched off as instructed by the manufacturer, reseat a removable battery and inspect the external mounting/discharge contacts.
Record any disagreement between:
- the battery’s own indicator;
- the bike display;
- the charger state.
That disagreement itself is useful information.
The problem appears only when the battery is mounted
If your system allows the observation safely, note whether battery/charger behavior changes when the battery is correctly installed.
A mount, lock, or external-contact problem can look like a dead battery from the rider’s perspective.
The bike behaves differently only while the charger is connected
That is another sign that the problem may sit beyond ordinary charge acceptance.
Once you have established that normal charging occurs, stop spending time on charger troubleshooting.
Controller faults, motor wiring, brake cutoff sensors, pedal-assist systems, throttles, and other bike-side electrical problems belong in a separate diagnostic workflow.
And don’t open the battery simply to test whether it can produce current internally.
Still Not Charging? Use the Evidence to Choose the Next Step

After the appropriate external and symptom-specific checks, you should be deciding between charger replacement, warranty/service, or battery evaluation—not trying random fixes.
Before contacting support, collect this information
Save:
- exact bike model;
- battery model or part number;
- clear photo of the charger label;
- charger LED state before and during the attempted charge;
- starting battery percentage;
- ending battery percentage;
- whether charging begins at all;
- any repeatable early-charge cutoff;
- photos of the charge port and accessible contacts;
- storage history;
- recent extreme temperature exposure;
- rain, washing, flooding, or impact history;
- whether the symptom changes when the removable battery is properly mounted;
- the troubleshooting steps already completed.
Compare these two support descriptions:
“My e-bike battery won’t charge.”
Versus:
“The battery displays 12%. The original charger powers on, changes immediately to its documented finished state when connected, and the battery remains at 12%. The port is clean and dry, the battery is correctly seated, and the problem began with no recent impact, storage, or water exposure.”
The second description gives a manufacturer or technician something they can actually diagnose.
Replace the charger when the evidence points to the charger
A charger replacement becomes more reasonable when:
- the correct charger remains unpowered in a verified working outlet;
- its behavior conflicts with the manufacturer’s documented normal operation;
- manufacturer/dealer testing identifies the charger as defective.
Use only a confirmed compatible replacement.
CPSC advises using the supplied charger or one recommended by the device manufacturer.
Choose warranty or professional diagnosis before a battery when uncertainty remains
Escalate earlier when:
- the bike or battery is new;
- a port or connector is physically damaged;
- significant water or impact exposure occurred;
- an approved working charger still cannot initiate charging;
- a model-specific error persists after documented procedures;
- continuing diagnosis would require opening the battery.
A lithium-ion battery is expensive enough that replacing it on the basis of one symptom is poor diagnosis.
Replace the battery when the evidence actually converges on it
Battery replacement becomes more defensible when:
- the approved charging equipment has been verified;
- external connections are normal;
- setup, storage, moisture, and temperature explanations have been ruled out;
- the failure is repeatable;
- separate battery-health evidence supports deterioration or malfunction;
- manufacturer/dealer diagnosis identifies an internal fault;
- safe repair is unavailable or unreasonable.
Failure to charge by itself does not tell you which component failed.
The final question should be:
What evidence shows that the battery—not the charger, port, connection, environment, or bike-side system—is actually the failed part?
If you still can’t answer that after the safe checks above, don’t guess at the most expensive component. Take the diagnostic notes and photos you’ve collected to the manufacturer, dealer, or a qualified e-bike service provider. That’s the point where professional diagnosis saves more time and money than another round of DIY testing.