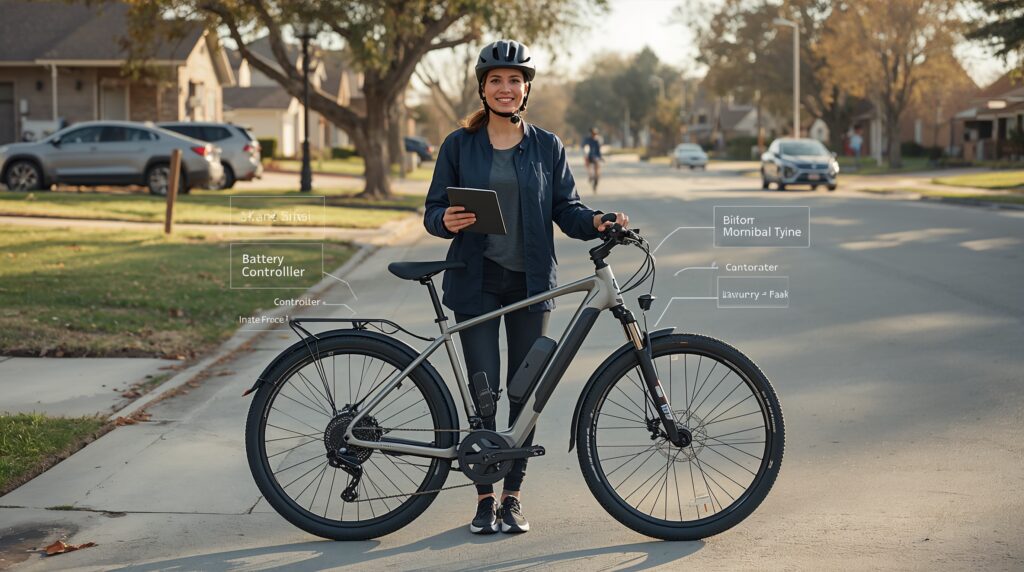
An electric bike has six core electrical component groups: the battery and battery management system, controller, motor, sensors, rider controls, and wiring. These work with the bike’s frame, brakes, wheels, tires, and drivetrain.
The battery supplies energy, the sensors detect what the rider and bike are doing, the controller regulates assistance, and the motor converts electrical energy into movement.
Some components are easy to see. Others may be hidden inside the frame, battery, or drive unit. Not every e-bike has a throttle, full display, brake cutoff sensor, suspension system, or connected app.
This guide will help you identify the major parts, understand how they work together, compare important options, and recognize compatibility or safety issues before they become expensive problems.
How this guide was researched: Technical explanations were checked against current U.S. Consumer Product Safety Commission guidance, UL safety-standard information, and documentation from established e-bike system manufacturers. Add the real writer, technical reviewer, review scope, and substantive update date before publication.
Electric Bike Components at a Glance

An e-bike combines two connected systems:
- An electrical assistance system that stores energy, reads rider input, and powers the motor.
- A mechanical bicycle system that supports the rider, transfers force, steers, and stops the bike.
Main electrical components
| Component | Typical location | Main function |
|---|---|---|
| Battery pack | Frame or rear rack | Stores electrical energy |
| Battery management system | Inside the battery | Monitors and protects the battery |
| Controller | Frame, battery mount, or drive unit | Regulates power sent to the motor |
| Motor | Wheel hub or crank area | Produces mechanical assistance |
| Pedal and speed sensors | Crank, motor, or wheel | Detect rider input and bike movement |
| Display and controls | Handlebar or top tube | Show information and change assistance |
| Throttle | Handlebar | Requests direct assistance on equipped bikes |
| Wiring and connectors | Along or inside the frame | Carry power and system information |
| Charger | Used off the bike | Recharges the battery |
Main mechanical components
| Component group | Main function | Why it matters on an e-bike |
|---|---|---|
| Frame and fork | Support and steering | Carry the rider, motor, battery, and possible cargo |
| Wheels and tires | Load support and traction | Manage additional weight, braking, and sometimes motor force |
| Brakes | Slow and stop the bike | Control the bike’s complete moving weight |
| Drivetrain | Transfer pedaling force | May also carry mid-drive motor force |
| Handlebar and saddle | Control and rider support | Affect comfort and low-speed handling |
| Suspension and accessories | Adapt the bike to its use | Add comfort, cargo capacity, lighting, or utility |
Recommended lead visual: Place an original side-view diagram here with separate electrical and mechanical layers. Use the same component names in the diagram, table, and section headings.
Which Components Does Every E-Bike Need?

The physical layout varies, but a functioning electric-assistance system normally needs:
- A way to store electrical energy
- Battery monitoring and protection
- Power-control electronics
- A motor
- A way to detect or receive rider input
- Electrical connections
- A way to switch on and control assistance
Those functions do not always appear as separate visible components.
The battery management system normally sits inside the battery pack. The controller may be hidden in the frame or integrated into the drive unit. A small handlebar control may combine the power switch, assistance buttons, indicator lights, and display.
Depending on the design, an e-bike may not have:
- A throttle
- A conventional screen
- Brake cutoff sensors
- Integrated lights
- Suspension
- GPS or cellular connectivity
- Electronic shifting
- Antilock braking
Modern e-bikes can operate as connected ecosystems. Bosch, for example, describes its motor, battery, display, control unit, and app as components that communicate within one system.
That integration improves functionality, but it can also make compatibility and replacement more complicated.
How Electric Bike Components Work Together

Understanding the relationship between the parts is more useful than memorizing a list.
Power flow
The simplified power path is:
Charger → battery and BMS → controller → motor → wheel or drivetrain
The charger replenishes the battery. The battery stores the energy. The controller regulates how much power reaches the motor. The motor converts that controlled electrical power into movement.
A hub motor applies assistance directly at a wheel. A mid-drive motor applies assistance through the crank and drivetrain.
Signal flow
The simplified control path is:
Rider input → sensor or throttle → controller → motor response
When you pedal, a cadence or torque sensor sends information to the controller. The controller combines that signal with the selected assistance mode, current speed, battery status, and programmed limits.
It then decides how strongly the motor should assist.
Feedback and protection
The controller or battery system may also monitor:
- Wheel speed
- Pedaling cadence
- Pedaling torque
- Brake input
- Battery voltage
- Electrical current
- Battery or motor temperature
- Communication faults
- Programmed assistance limits
The bike can use this information to modify, reduce, or stop assistance.
Some current Shimano systems combine cadence, torque, and speed information for integrated assistance and automatic shifting.
This explains why two bikes with similar motor specifications can feel very different. Sensors, controller programming, gearing, firmware, assistance modes, and weight distribution all affect the response.
The Electrical Components Explained

Motor
The motor converts electrical energy into movement.
The two most common layouts are:
- Hub motor: Built into the center of the front or rear wheel
- Mid-drive motor: Mounted around the crank area
A hub motor turns its wheel directly. A mid-drive motor sends assistance through the chain or belt and the bike’s gearing.
Motor wattage alone does not determine performance. Placement, available torque, controller limits, gearing, wheel size, heat management, total load, and terrain also matter.
A rear-hub system can be practical for relatively flat commuting. A mid-drive may suit steep hills or cargo use because it can apply assistance through the bike’s lower gears.
Neither design is automatically better.
Battery pack
The battery stores energy for the motor and other powered features.
A typical lithium-ion battery pack includes:
- Multiple battery cells
- A battery management system
- Internal electrical connections
- A protective enclosure
- A mounting and locking interface
- A charging connection
Common battery specifications include:
- Voltage: The system’s nominal electrical potential
- Amp-hours: A measure associated with stored charge
- Watt-hours: Nominal voltage multiplied by amp-hours
Watt-hours are useful when comparing nominal energy capacity, but they cannot predict an exact range. Hills, wind, temperature, The Electrical Components Explained, rider and cargo weight, assistance level, tire pressure, and mechanical condition all influence energy use.
Battery placement affects handling as well. A low, centrally mounted battery generally keeps more weight near the middle of the bike. A rear-rack battery places more weight toward the back but may be convenient to remove.
Battery management system
The battery management system, or BMS, normally operates inside the battery pack.
Depending on its design, it may:
- Monitor cell groups
- Monitor current and temperature
- Limit charging or discharging
- Balance cells
- Respond to short-circuit conditions
- Disconnect the battery under certain abnormal conditions
- Communicate with the controller or charger
CPSC recommends a system-based battery-safety approach that includes suitable cells, a proper BMS, compatible charging equipment, and testing of the cells, battery, charger, and end product together.
A BMS is an important protection layer, not a guarantee against every possible failure. It cannot make a damaged, modified, incompatible, or badly manufactured battery safe.
Controller
The controller manages the relationship between the battery, sensors, rider controls, and motor.
It may:
- Receive power from the battery
- Interpret cadence, torque, speed, or throttle input
- Regulate motor current
- Control acceleration behavior
- Manage assistance modes
- Respond to brake input
- Monitor temperature or faults
- Communicate with the display, battery, motor, or app
The controller may be a separate box, but it can also be installed inside the frame, battery interface, or drive unit.
Are e-bike controllers interchangeable?
They should not be assumed interchangeable.
A replacement may need to match:
- System voltage
- Motor type
- Battery and motor current limits
- Sensor types
- Connector pin assignments
- Display protocol
- Battery communication
- Firmware
- Assistance programming
- Protective functions
Matching voltage and plug shape is not enough.
Cadence, torque, and speed sensors
Sensors tell the controller what the rider and bike are doing.
A cadence sensor detects whether the cranks are rotating. Cadence-based systems can be simple and predictable, although some have a noticeable delay when assistance begins or ends.
A torque sensor measures how forcefully the rider is pedaling. It usually allows assistance to increase or decrease with rider effort, producing a more proportional response.
A speed sensor detects wheel or bicycle movement. The system may use that information for the speed display, assistance control, shifting functions, or diagnostics.
Several sensor types can operate together. The final ride feel depends on the controller and software as well as the sensor itself.
Display and rider controls
The rider interface may show or control:
- Assistance level
- Battery status
- Current speed
- Trip distance
- Estimated range
- Lighting
- Walk assistance
- Navigation
- Error information
- Security features
Not every bike needs a large display. Some use indicator lights, a compact remote, a smartphone, or an all-in-one control unit.
Whether a particular bike can operate without its display depends on that system’s design. Do not disconnect a display merely to test the possibility.
Throttle
A throttle requests motor assistance through a handlebar control.
Common types include:
- Thumb levers
- Trigger controls
- Half-twist throttles
- Full-twist throttles
The throttle normally sends an input to the controller. It does not power the motor directly.
Many e-bikes do not have throttles. Their availability and permitted operation depend on the bike’s design and applicable local rules.
Wiring and connectors
The wiring system carries both electrical power and information.
It may include:
- High-current battery cables
- Motor connections
- Sensor wires
- Display communication
- Brake cutoff connections
- Lighting connections
- Charging connections
- Data links between integrated parts
Connectors that look identical may use different pin assignments, voltage levels, current capacities, or communication protocols.
Do not rely on plug shape or wire color to establish compatibility.
Brake cutoff sensors
A brake cutoff sensor tells the controller that a brake has been applied. The controller can then reduce or stop motor assistance.
These sensors are common on some throttle-equipped and conversion systems, but they are not universal.
A damaged or incorrectly positioned cutoff sensor can sometimes prevent assistance because the controller believes a brake is still engaged.
Charger
The charger converts household power into the controlled output needed by the battery.
A charging plug that fits physically is not necessarily safe. Output voltage, current, charging logic, connector arrangement, communication, and manufacturer approval may all matter.
CPSC advises riders to use the supplied charger or one recommended by the product manufacturer.
Lights and connected features
Optional electrical components may include:
- Integrated headlights and taillights
- Turn signals
- GPS
- Cellular connectivity
- Alarms
- Electronic shifting
- Antilock braking
- USB power
- Smartphone integration
- Range-extender batteries
These features may draw power from and communicate with the main system. Replacing or adding them can require both electrical and software compatibility.
The Mechanical Components That Matter Most

An e-bike uses many conventional bicycle parts. The difference is the weight and force those parts may need to manage.
Frame and fork
The frame supports the rider, battery, motor, accessories, and cargo.
It may also contain:
- A battery compartment
- Reinforced motor mounting points
- Internal wiring channels
- Proprietary access panels
- Integrated racks
- Cooling or drainage features
The fork supports steering and front-wheel braking loads. A front-hub conversion can add motor torque at the fork dropouts, making correct installation especially important.
Wheels, tires, and brakes
The wheels and tires carry the complete load and provide traction for acceleration, cornering, and braking.
Check them regularly for:
- Correct tire pressure
- Tread and sidewall damage
- Loose or damaged spokes
- Rim condition
- Axle security
- Wheel alignment
The brakes must stop the rider, bike, battery, motor, and possible cargo.
Inspect:
- Brake-pad wear
- Rotor or rim condition
- Lever feel
- Cable condition
- Hydraulic leaks
- Caliper alignment
- Mounting hardware
A large rotor or hydraulic system is not automatically effective if it is poorly installed or maintained.
Drivetrain
The drivetrain may include:
- Crankset
- Chainring
- Chain or belt
- Cassette or sprocket
- Derailleur
- Internal-gear hub
- Shifter
- Pedals
On a mid-drive e-bike, motor and rider force pass through much of the drivetrain. Shifting under heavy assistance can increase wear.
A hub motor applies motor force at the wheel, although the normal drivetrain still transfers the rider’s pedaling force.
Contact points and suspension
The handlebar, grips, pedals, and saddle affect comfort and control.
They matter particularly when a bike is:
- Heavy to maneuver
- Used for long distances
- Carrying cargo
- Frequently stopped and restarted
- Ridden over rough surfaces
Suspension can improve comfort and control on uneven terrain, but it also adds weight, cost, and maintenance. It should match the intended riding surface.
Two Choices That Change How an E-Bike Feels

Hub motor or mid-drive?
| Consideration | Hub motor | Mid-drive motor |
|---|---|---|
| Position | Front or rear wheel | Crank area |
| Motor-force path | Directly to the wheel | Through the drivetrain |
| Flat commuting | Often simple and effective | Effective but commonly more expensive |
| Steep climbing | Depends heavily on the complete setup | Can use the bike’s lower gears |
| Drivetrain wear from motor | Lower | Potentially higher |
| Wheel servicing | Motor wheel is heavier | Wheels are usually conventional |
| Weight location | Concentrated at one wheel | More central |
Choose according to terrain, load, service access, ride feel, and budget—not the assumption that one position is always superior.
Cadence sensor or torque sensor?
| Consideration | Cadence sensor | Torque sensor |
|---|---|---|
| Detects | Crank rotation | Pedaling force |
| Typical feel | Predictable or more switch-like | Proportional and responsive |
| Rider effort | Can provide strong help with light pressure | Assistance normally follows effort |
| Typical cost | Lower | Higher |
| Often suits | Simple commuting and easy assistance | Varied terrain and natural ride feel |
A torque sensor is not better for every rider.
Someone with limited strength may prefer a cadence system that provides substantial assistance without hard pedaling. A rider navigating technical terrain or busy streets may prefer the more proportional response of torque sensing.
Controller tuning, firmware, gearing, and assistance mode also affect both systems.
Identify the Components on Your Own E-Bike

You can identify most major components without opening an electrical enclosure.
1. Locate the battery
Look on or inside:
- The down tube
- The seat tube
- The area behind the seat tube
- A rear rack
- The main frame
Record the battery model, nominal voltage, watt-hours, and serial number when available.
2. Find the motor
Check:
- The front wheel hub
- The rear wheel hub
- The crank and pedal area
A large wheel hub usually indicates a hub motor. A housing around the crank usually indicates a mid-drive.
3. Record the controls
Note whether the bike has:
- A display
- An LED control panel
- A separate handlebar remote
- A throttle
- Brake cutoff wiring
- App connectivity
4. Find the official documentation
Use the bike manufacturer’s manuals and model pages rather than depending only on marketplace listings.
Record:
- Motor brand and model
- Battery model
- Charger model and output
- Display or control family
- Tire size
- Brake model and pad type
- Drivetrain model
5. Build a component passport
| Item | Information to record |
|---|---|
| Bike | Brand, model, year, and frame serial number |
| Motor | Brand, model, and serial number |
| Battery | Model, voltage, watt-hours, and serial number |
| Charger | Model and output specifications |
| Controls | Display and remote model |
| Brakes | Brake and pad model |
| Tires | Complete size and load information |
| Drivetrain | Chain, cassette, belt, or hub specification |
| Support | Dealer, warranty, and service contact |
| Software | App, firmware, or diagnostic requirements |
Keep this record with the receipt and warranty. It can save time when ordering parts, checking a recall, filing a warranty claim, or speaking with a repair shop.
Do not open the battery or motor housing to complete it.
Which Components Matter Before You Buy?

Start with the job the bike needs to perform.
Daily commuting
Prioritize:
- Reliable brakes
- Practical battery removal
- Integrated or dependable lights
- Road-appropriate tires
- Weather-protected connectors
- Manageable bike weight
- Cargo options
- Local service access
A rider who charges in an upstairs apartment may benefit more from a removable battery and manageable total weight than from maximum motor torque.
Hills and cargo
Prioritize:
- Suitable motor layout
- Low gearing
- Available torque
- Thermal management
- Frame and rack limits
- Strong brakes
- Wheel strength
- Stable low-speed handling
A cargo bike needs appropriate brakes, frame capacity, tires, gearing, and handling—not merely a high motor-power figure.
Long-distance riding
Prioritize:
- Battery capacity
- Realistic range information
- Efficient tires
- Comfortable contact points
- Charger availability
- Replacement batteries
- Range-extender support where offered
Trails
Prioritize:
- Appropriate frame geometry
- Suspension quality
- Tire grip and protection
- Braking control
- Ground clearance
- Battery security
- Protected wiring
Easy maintenance
Prioritize:
- Common tire sizes
- Standard brake pads
- Available drivetrain parts
- Published service information
- Replacement batteries
- Repair-network access
- Diagnostic support
- Clear warranty terms
Ask these five questions
- Can I obtain the correct replacement battery and charger?
- Who can diagnose the electrical system locally?
- Are the brakes, tires, and drivetrain parts readily available?
- Does the manufacturer publish useful manuals and specifications?
- Which components are proprietary or require software pairing?
These questions often reveal more about long-term ownership than headline motor and range figures.
Standard and Proprietary Parts

Parts that are often easier to replace
Depending on the bike, these may include:
- Tires and tubes
- Brake pads
- Chains
- Cassettes
- Pedals
- Saddles
- Grips
- Some rotors
- Some derailleurs
These parts must still match the correct size, interface, and manufacturer requirements.
Parts that may be system-specific
Compatibility risk is generally higher with:
- Battery packs
- Battery mounts
- Chargers
- Controllers
- Displays
- Wiring harnesses
- Motor connectors
- Firmware
- Diagnostic tools
- Integrated locks and lights
A more expensive bike with documented parts and nearby service support may be more economical to own than a cheaper model whose essential components cannot be obtained.
What to Check When Something Feels Wrong

Safety boundary: Do not open a battery pack, bypass the BMS, probe energized connectors, alter controller-current limits, or connect undocumented wiring.
| Symptom | Possible systems | Safe first checks |
|---|---|---|
| Bike will not power on | Battery, controls, wiring, controller | Confirm the battery is charged, undamaged, fully seated, and switched on |
| Assistance cuts out | Battery, brake sensor, pedal sensor, wiring, controller | Note whether it happens under load, over bumps, during braking, or after heating |
| Assistance begins late | Cadence sensor, alignment, settings | Compare assistance modes and inspect visible sensor parts |
| Range drops | Battery, tires, brakes, temperature, load | Check pressure, wheel rotation, weather, route, and cargo |
| Clicking under load | Chain, cassette, crank, motor mount | Stop using heavy assistance and inspect visible mechanical parts |
| Heat or burning smell | Battery, connector, controller, charger, motor | Stop using the system and seek professional help |
A repeatable pattern is useful diagnostic information. Record when the problem happens instead of replacing parts at random.
Stop riding or charging if you notice:
- Smoke
- Hissing
- A chemical smell
- Battery swelling
- Melted or discolored connectors
- Rapidly increasing heat
- Exposed wiring
- Repeated electrical shutdowns
- Water inside an electrical enclosure
Battery Charging and Certification
CPSC advises riders to remain present while charging, avoid charging while sleeping or away from home, follow the manufacturer’s instructions, unplug the device when charging is complete, and use only the supplied charger and an approved replacement battery.
UL 2849 evaluates the electrical drive train, battery, and charger as a system combination. UL 2271 applies to batteries used in light electric vehicle applications.
Certification is an important safety signal, but it does not replace:
- Compatible components
- Proper charging
- Recall checks
- Routine inspection
- Manufacturer instructions
- Professional evaluation after damage
Seek qualified help for a swollen or damaged battery, melted high-current connector, water-damaged electrical system, repeated overheating, internal motor fault, controller failure, or unexplained charging problem.
Frequently Asked Questions

What are the main components of an electric bike?
The main electrical components are the battery and BMS, controller, motor, sensors, controls, and wiring. A charger is also required but normally remains off the bike. The frame, wheels, tires, brakes, and drivetrain form the main mechanical system.
Is the BMS part of the battery?
Usually, yes. In most lithium-ion e-bike systems, the battery management system is installed inside the battery pack, where it monitors and manages the cells and charging or discharging conditions.
Can an electric bike work without a display?
Some systems use indicator lights, a compact control unit, an all-in-one interface, or a smartphone instead of a conventional display. Whether a specific bike can operate after its display is disconnected depends on the system.
Are e-bike controllers interchangeable?
They should not be assumed interchangeable. Voltage, current limits, motor type, sensors, connectors, communication protocols, display compatibility, battery communication, firmware, and protective functions may all need to match.
Is a torque sensor better than a cadence sensor?
Not for every rider. Torque sensing usually provides a more proportional response. Cadence sensing may provide stronger assistance with lighter pedal pressure. Controller programming and motor tuning also affect the experience.
Choose Your Next Step
Your next action depends on why you came to this guide:
- Learning how an e-bike works: Follow the power and signal paths from the battery to the motor.
- Comparing bikes: Use the five buying questions and verify replacement-part availability before ordering.
- Maintaining a bike: Create a component passport and record the exact battery, charger, brake, tire, and drivetrain models.
- Battery Charging and Certificationa problem: Use the symptom table for safe observations, then consult the manufacturer or a qualified technician when electrical work is required.
The most important lesson is that an electric bike is a connected system—not simply a bicycle with a battery and motor attached.
How well those components communicate, how safely they are matched, and how easily they can be serviced will affect the ownership experience long after the first ride.
Pingback: How Fast Do Electric Bikes Go? 20 vs 28 MPH - electricscootercar.com
Pingback: Electric Bike vs Bicycle: Which One Is Right for You? - electricscootercar.com
Pingback: How Do Electric Bikes Work? A Simple 6-Step Guide - electricscootercar.com
Pingback: Electric Bike vs Scooter: Which Is Better for Your Commute? - electricscootercar.com
Pingback: What Is an Electric Bike? How It Works, Classes & Range - electricscootercar.com
Pingback: Why Is My Electric Bike Slow? Diagnose It by Symptom - electricscootercar.com
Pingback: Solid-State E-Bike Batteries in 2026: What’s Real and Should You Wait? - electricscootercar.com
Pingback: Electric Bike Components Explained: How the Whole System Works - electricscootercar.com
Comments are closed.